
I know I discussed all the little joys of Fall in my last post, the main point being that
Halloween is coming up! And we even gave a preview of the plans for the yard this year.
Welp - I'm happy to share that the yard decorations are up and they look fantastic!
You have to know by now I'm going not going to show you the big finish until the end of the post!
Halloween decor has to start with the interior of the house, right? On October 1st to be exact.
First up, the fireplace. Gives me a ghoulish feeling already...

but wait! It gets better!

How fantastic is that? We swapped out all of our normal pictures for Halloween themed ones.
On the sides these two black and white retro pictures:


These are just photos I found via Google, printed on cardstock paper and lovingly
inserted into frames from the dollar store. Can't beat that!
The main star of the show is the large one at the top. We were lucky enough to find that print on Allposters.com for $4.99 (on clearance!) With shipping the grand total was $7 something. Then we hit the thrift stores to find a frame that would fit the print. We did!

@ the Habistore for $4. Only thing missing was the glass, Dylan took that on and had custom piece made for $20. Then he busted out his excellent artist skills and cut us a custom mat for it.

That cool orange colored mat was another $4.

Grand total for this lovely decoration that will grace our walls for years and years to come?
$35 (something)
Not too shabby, especially since we called about custom framing and it starts at $80.
I call this one excellent and frugal investment!
(btw, Hi Sherms!!)
Now take a look at the entry way this year:

Scored the felt jack-o-lantern from the dollar store last year, and we had to keep the area clear enough for Arnie to sit up there and eat his food. (Any cat owner knows, you do not inconvenience your cat without paying the price!) But all in all I'm pretty happy with it. That little black window piece looks really cool when you light it up (with one of those little flameless candle things) and the glow in the dark feet that are currently in the cauldron have to go somewhere - we just haven't decided where exactly they'll be going. Yet.
Now the cube shelves:

Spider town! I have a couple of larger spiders I wanted to make hang, but I can't get the weight distribution right. So for now, they're just sitting on a couple of random shelves. Also, I would love more spiders - but I ran into a snag. These particular 5 came with some webbing, they have these little hooks almost. So I can roll up a strip of tape and essentially hang them. I tried to put on more spiders using spider rings, but they're dependent on the stickiness of the tape, and it simply does not hold up. Jumping fake spiders - just as scream inducing as jumping real ones. Only followed by a wave of relief. Any tips on getting the rings to stick would be greatly appreciated, I'd like to make the cube shelves spidery-er.
There's a few more cute Halloween items up around the house, and a couple more plans that haven't been put into place yet, so I'll update you guys on those later. But what we did complete was the front yard!!
First Dylan spray painted our PVC pipes black:

We then removed the cheesy cardboard heads from our yard stakes:

bent those into new hook shapes for our skeleton crew:

And addressed the "swingin' in the wind!" issue using some craft wire:

The end result?

I love them!!
Funny story here, see, we purchased 7 skeletons. We made plans for 7 skeletons. And then the day the 7 of them were supposed to go up ... one went missing! Totally spooky right? We never found him, he's probably roaming the halls of some abandoned building, haunting unsuspecting teenagers who dare one another to enter. But I digress, we went back to the store and got another skeleton so we could finish the whole look.
Then we considered what we would do with the front window this year,
and we thought, wouldn't it be cool if we could use some of our plug in pumpkins
(not fit for outdoor use, of course) so we finagled a brilliant plan!

1 cardboard box, 1 milk crate, 1 broken tripod and one sheet later

And we have 3 varying height spooky jack-o-lanterns happily smiling out at all of our neighbors.
Bonus: the curtains cover this completely so you're not leaving your home wide open all day/night long!

They're all plugged into a handy power cord so all we have to do is flip the switch!
Now, at night!!

Our new green jack-o-lantern lights everything up, and the spooky inside only jacks are shining bright from the window. Its softly lit and spooky, it looks GREAT!!


But did you think I was done with my yard?! Tisk. You know me better than that!
Over by the gate we have cute overload:

We still want to get a pumpkin for the planter the vampire and his ghost friend are residing in.
By the front door our oldest and dearest Halloween pals
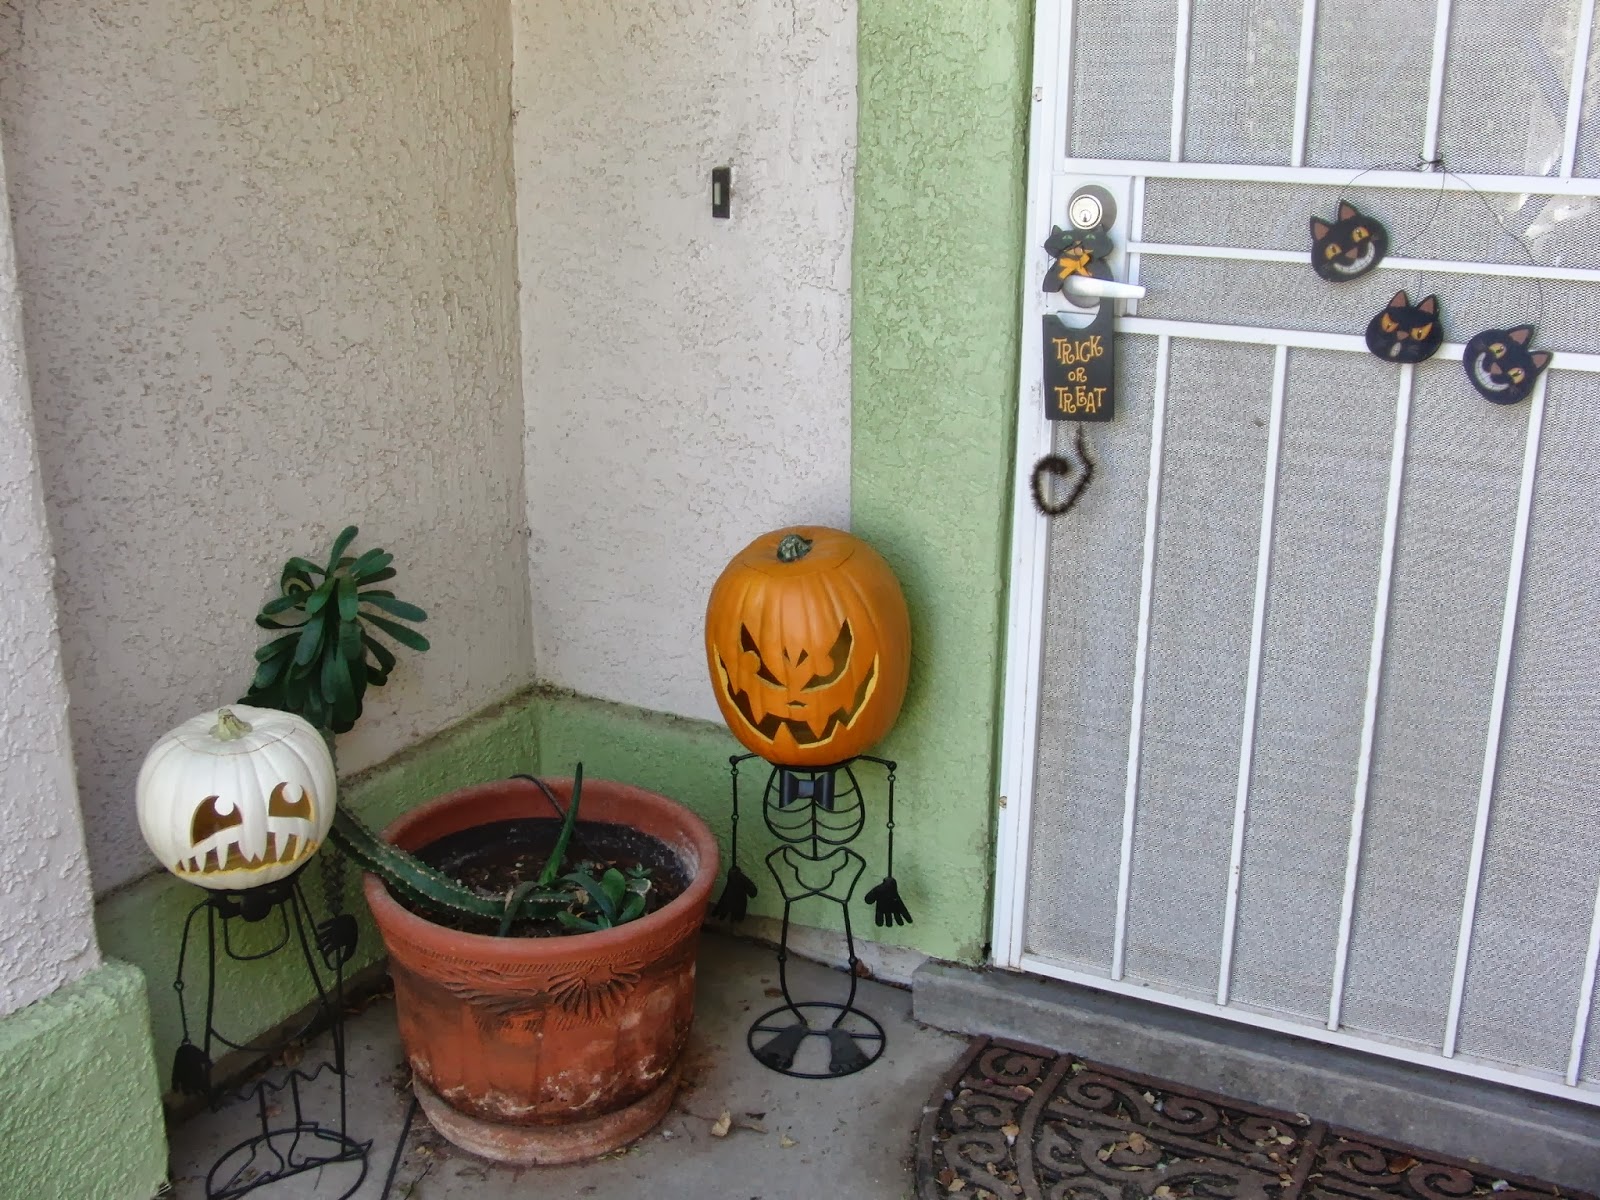
Who at night transform into a couple of spooky floating faces when we turn the porch light off

Operation Decoration: COMPLETE! Mission accomplished, with
embellishments yet to come! I can't wait to show you all, see you next time!